
Installation Instructions
Before You Start
This integration requires a special installation link and password. If you're interested in using Hover's Salesforce integration, please fill out this form and the install link and password will be sent to you.
Version Information
Updated: 1/23/2024
Latest Version: 1.2.1
Installing the Package
Once you have received the installation link from the Hover team, you can append the package installation link to the end of your Salesforce instance's URL. For example, here's what an installation link might look like:
https://hoverinc.salesforce.com/packaging/installPackage.apexp?p0=12345
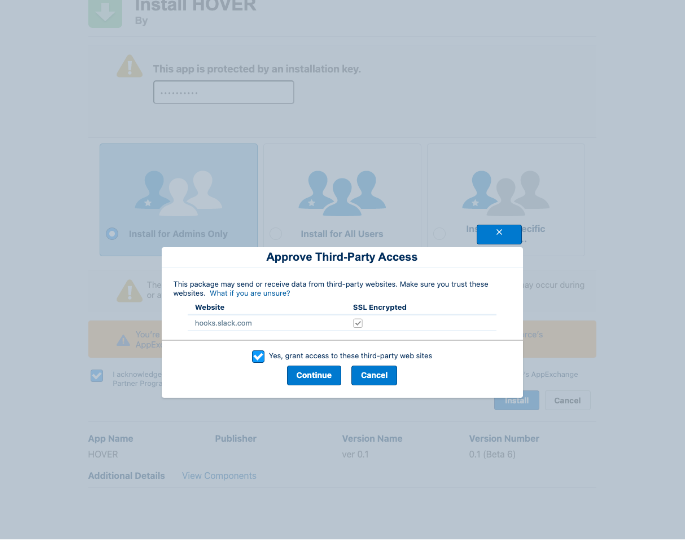
- When prompted, enter the provided password for the integration
- The package has the option to send alerts to a Slack instance. If you utilize Slack, you’ll be able to take advantage of some alerting included with the package.
- Nothing will be sent to Slack unless specifically configured in your Salesforce instance
- Either way, you’ll need to grant access to Slack, even if you don’t intend to use it. Select the checkbox and press Continue.
The installation process usually takes a few minutes. You’ll be notified via email when it has finished installing. Once this process is complete, proceed to your Salesforce instance and navigate to the Setup page.
Setting up a Digital Experiences Site
The Digital Experience site is a necessary step for our webhook/events-based functionality to work. This public site will be used to set up and pass webhook events from HOVER into a custom object in Salesforce (an object called “HOVER Webhooks”) and allow real-time visibility into where specific HOVER jobs are within our 3D reconstruction pipeline.
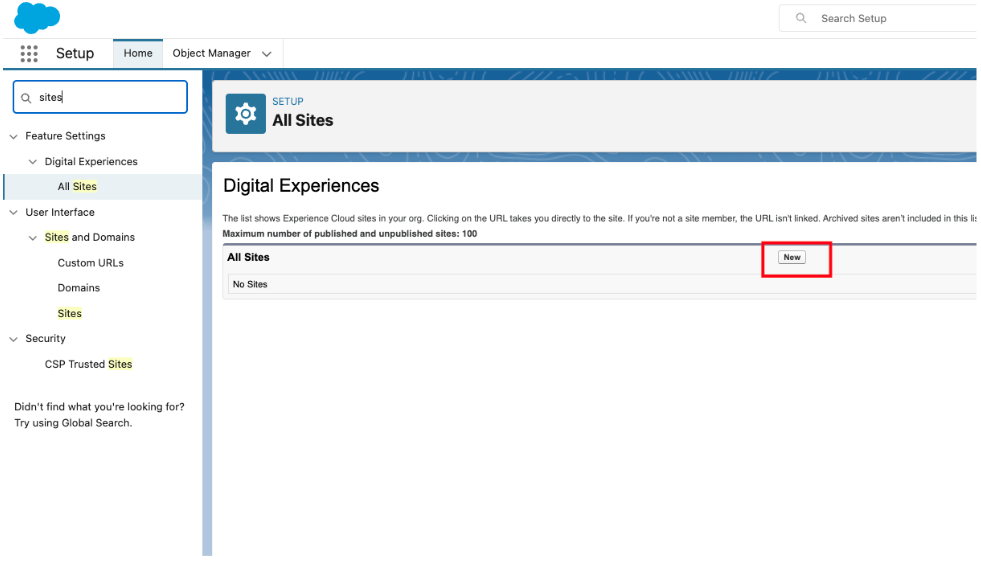
- From your Salesforce Setup page, search for "Sites” in the Quick Find tool.
- If this setting has not been enabled on your Salesforce instance, enable it now.
Once enabled, search for "sites" in the Quick Find tool.
- If this setting has not been enabled on your Salesforce instance, enable it now.
- Create a new site within the Digital Experiences sub-setting.
- You may use any template from the options available to you. You can name the site anything you would like and you do not need to append anything to the provided URL.
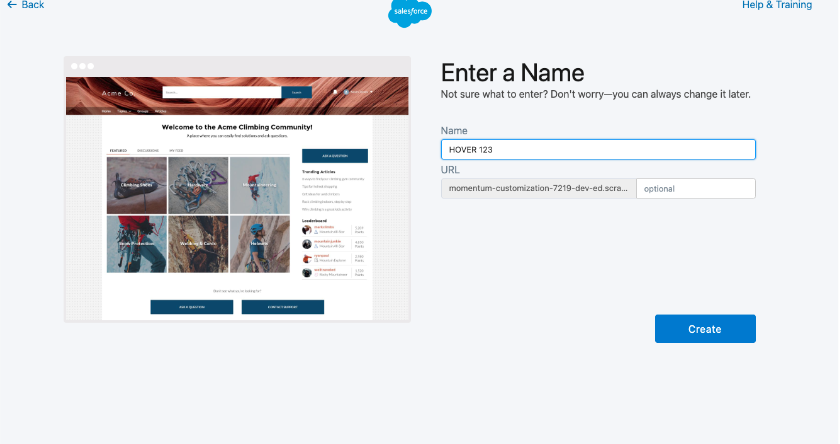
- Once the site has been created, navigate to the site Builder tool.
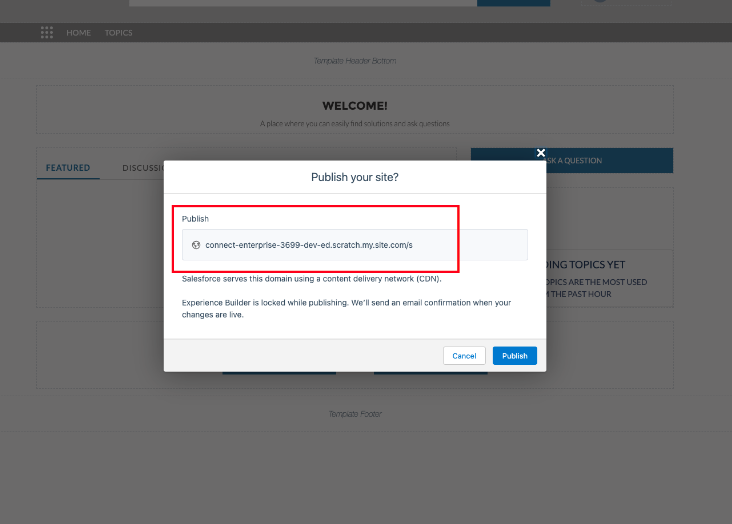
- Click "Publish" in the top right corner.
- Take note of the Site URL – copy this to your clipboard and save this as we’ll need it in a future step!
- After the site has been published, click the settings cog on the Site Builder and click on the profile under the "Configure access for guest or unauthenticated users" header (under Guest Profile Access).
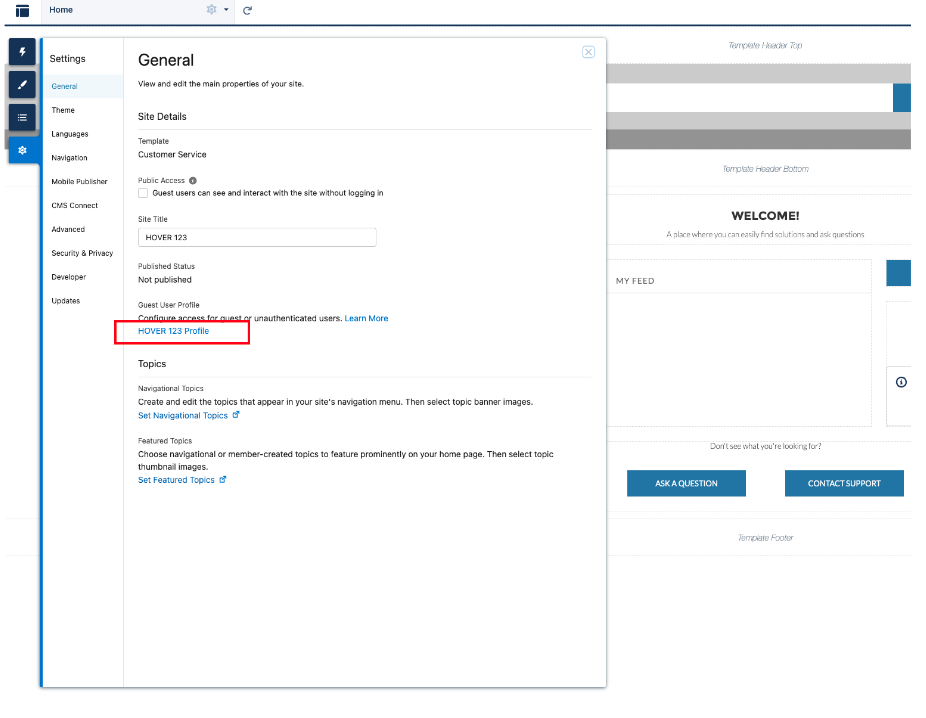
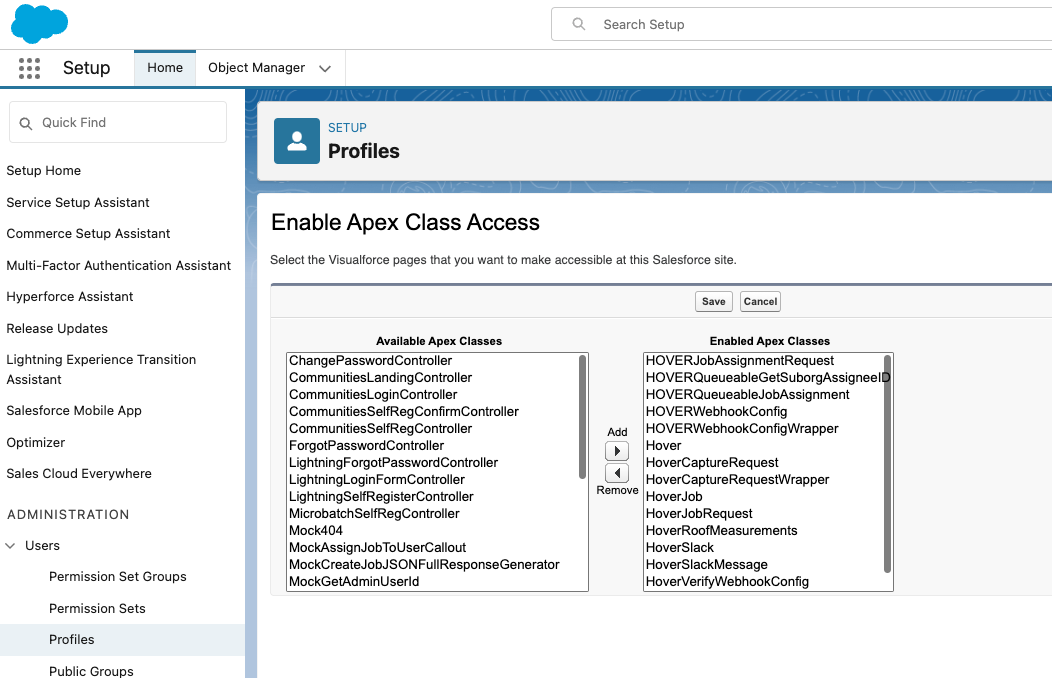
- Navigate to the "Enabled Apex Classes" section and select "Edit"
- From this menu, add all Apex classes prefixed with Hover and save your changes.
Creating an Integration in your Hover Org
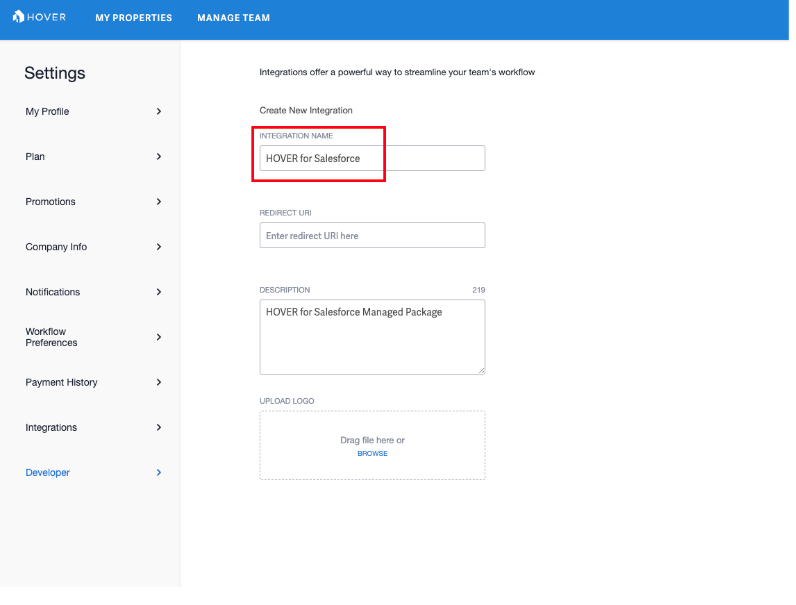
- Log into Hover and follow these instructions to create a new integration in your HOVER org.
- You’ll need to take note of your integration’s Client ID and Client Secret fields to connect to Salesforce.
Note: You’ll be required to name your OAuth Application in HOVER. It’s recommended that you use the name, “HOVER for Salesforce” as this will help us with any future troubleshooting with the integration.
Creating an Auth Provider in Salesforce
- From the Salesforce Quick Find box, search for “Auth. Providers”
- Create a new Auth Provider with the Provider Type set to Open ID Connect. Click Save and proceed to the next page.
- On this page, there will be multiple fields that can be filled with the bolded values below (_note: these values are case sensitive).
- Name: HOVER
- URL Suffix: HOVER
- Consumer Key: Your HOVER Client ID (from the previous step)
- Consumer Secret: Your HOVER Client Secret (from the previous step)
- Authorize Endpoint URL: https://hover.to/oauth/authorize
- Token Endpoint URL: https://hover.to/oauth/token
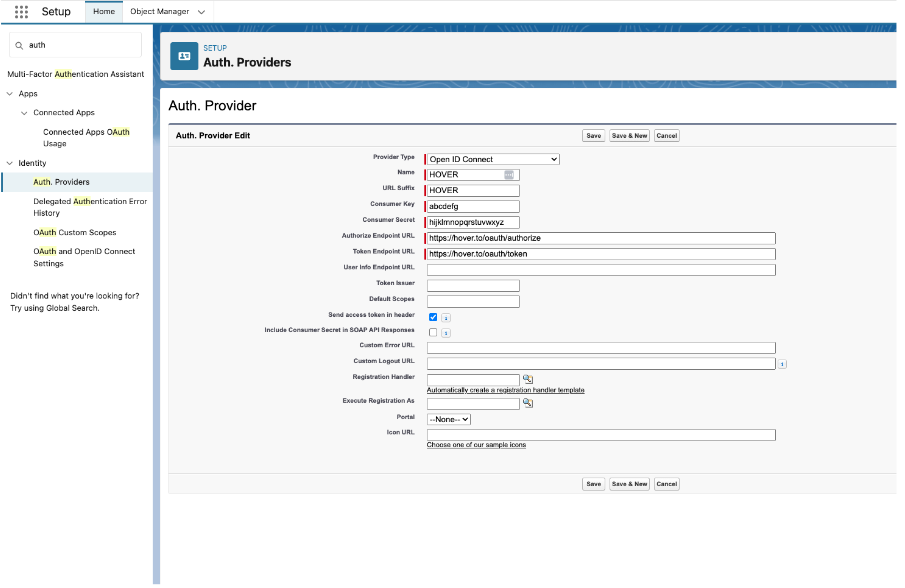
- Press Save
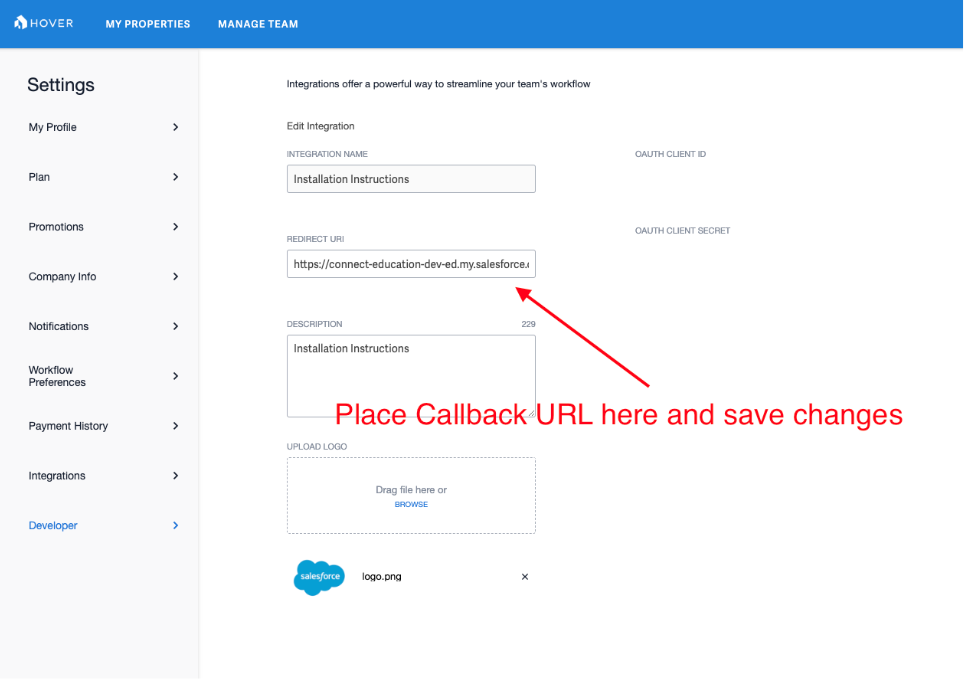
- Once saved, you will be redirected to the Auth Provider Detail Page. Find the Callback URL at the bottom and copy to your clipboard.
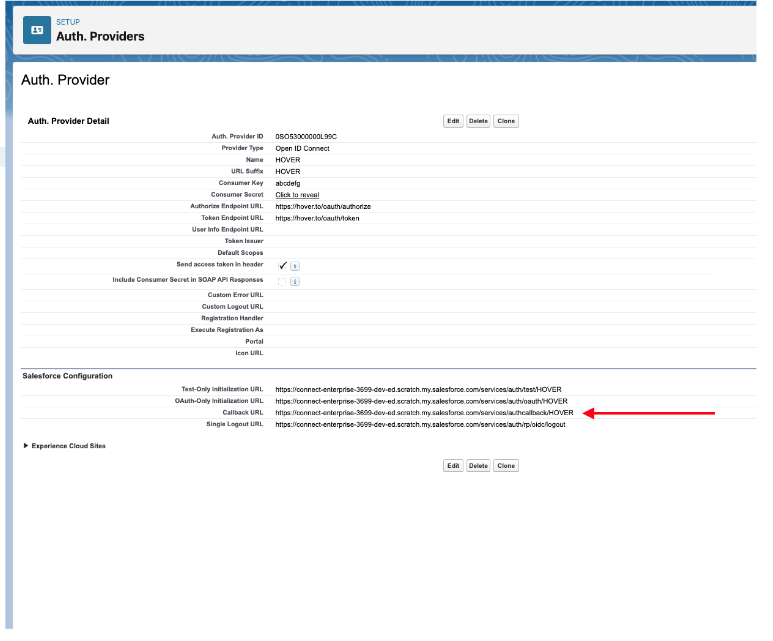
- This value needs to be placed on the Integration page in HOVER as your application's Redirect URI
Set Up Named Credentials
- In the Quick Find Menu, navigate to "Named Credentials"
- Click the “New” Dropdown list and select “New Legacy”
- Input the following fields bolded below:
- Label: HOVER
- Name: HOVER
- URL: https://hover.to/
- Identity Type: Named Principal
- Authentication Protocol: OAuth 2.0
- Authentication Provider: HOVER
- Click "Save" -- this will kick off the authentication process and you should be redirected to the Hover web application
- Click "Allow" to complete the authentication process in Hover. You should be redirected back to Salesforce.
Setting up your Webhook Connection with Hover
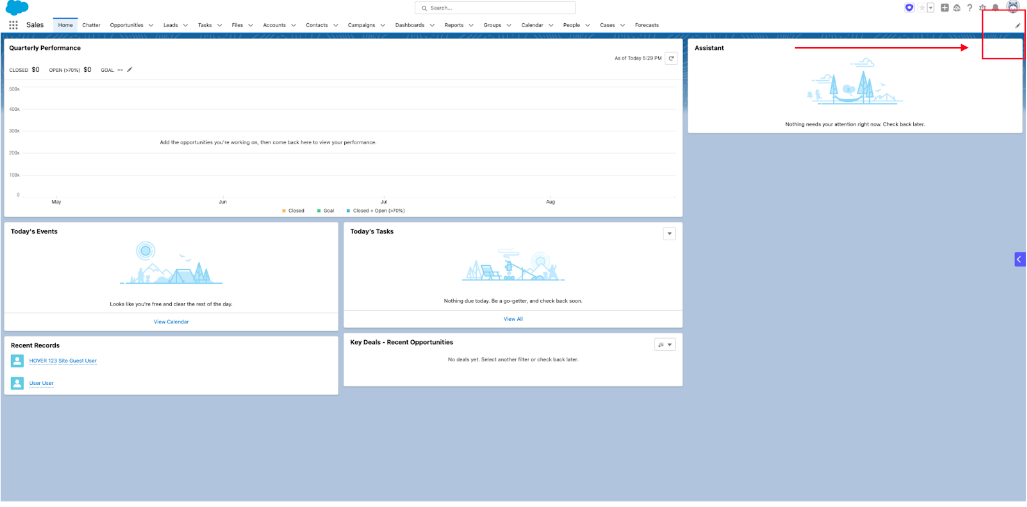
- Click into the "Sales" tool from Salesforce app navigator
- There’s a small pencil icon at the top right of the Sales page that can be used to edit the list of available objects. Edit the list to add the Hover Job, Hover Webhook, and Hover Webhook Config objects to your view.
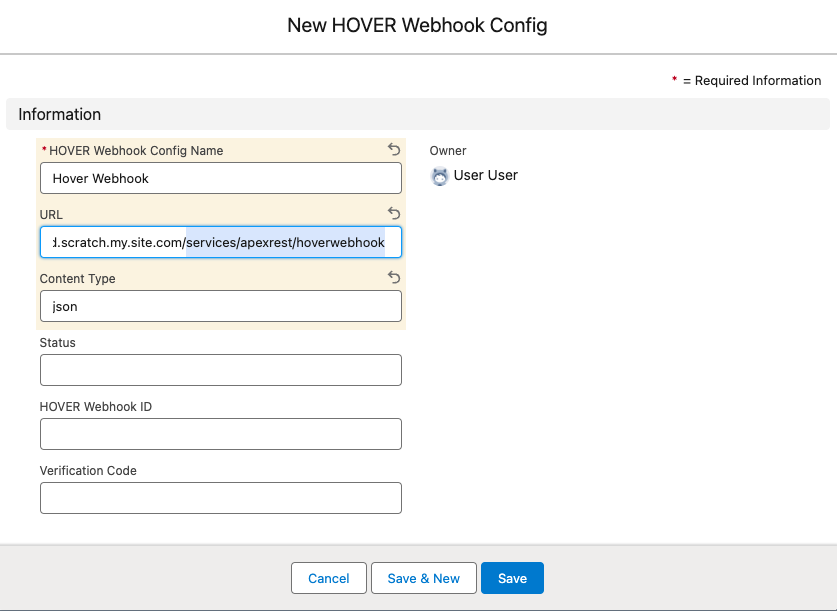
- Click on the Hover Webhook Config object and select "New".
- Place a value in the Name field – you can name this webhook connection anything you would like.
- The URL of this object needs to be your site name appended by "/services/apexrest/hoverwebhook".
- An example like would look like this: https://connect-energy-developer-edition.na211.force.com/services/apexrest/hoverwebhook
- The response type is "json".
- Save your config object. After a few moments, you can refresh your page and the webhook configuration object should have a status of "verified".
Your webhook has been created and associated with your HOVER organization!
Testing the Integration
Now that the webhook has been created on your HOVER org, we can test the integration using a built-in utility on the HOVER job object.
- Navigate to the HOVER Jobs object in your Sales app and click the New option. A modal should pop up where you can fill in a test job’s information.
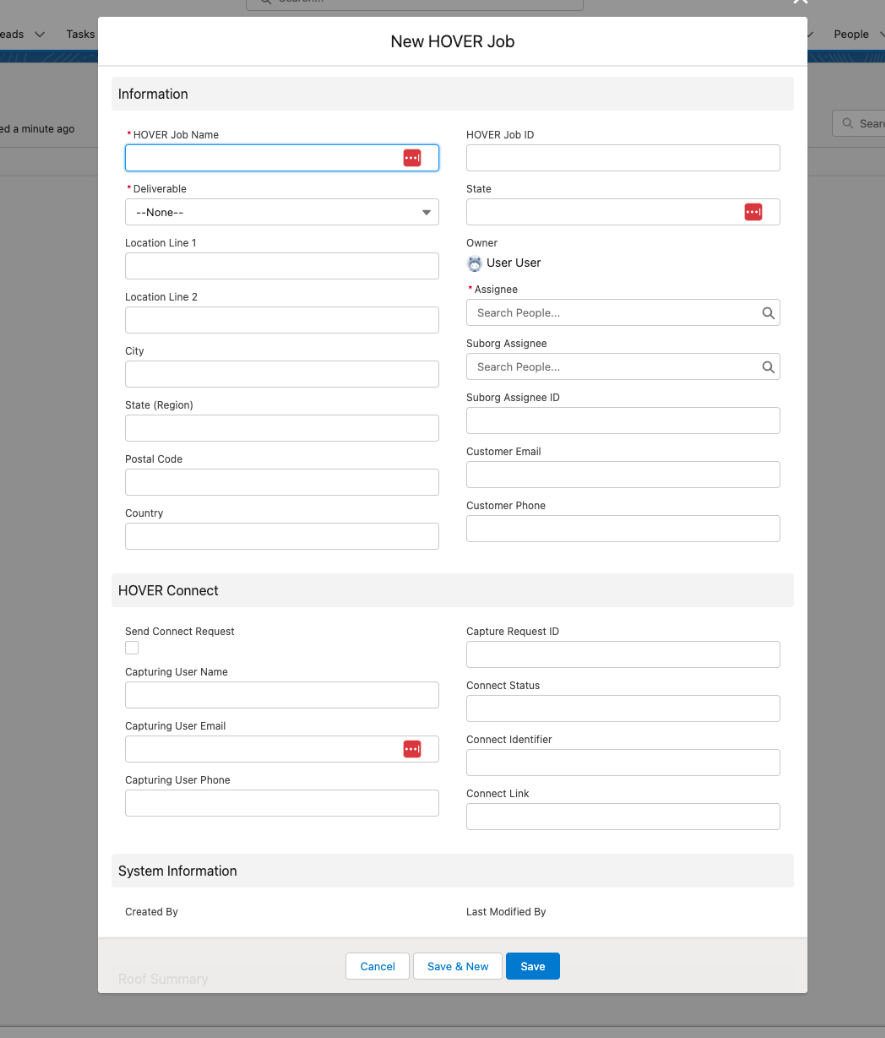
Fill out the required fields in the form, namely:
- Job Name
- Deliverable
- Location Line 1
- Assignee
- Make sure the assignee's email address matches an email address in your Hover org!
You can fill in any other fields you’d like (or even create a Capture Request instead of a shell job). Press Save when you’re ready.
You’ll be redirected to the HOVER Job Details page in Salesforce; if you refresh the page, you should see a HOVER Job ID automatically populate and a “state” of “uploading”. This means the shell job is created in HOVER!
If you proceed to your HOVER homepage, you should see a shell job created in your HOVER org.
To test the entirety of the workflow, scroll to the bottom of the page.
There is a blue button that says “Mark Job as Completed”. This utility simulates the HOVER reconstruction pipeline with sample data.
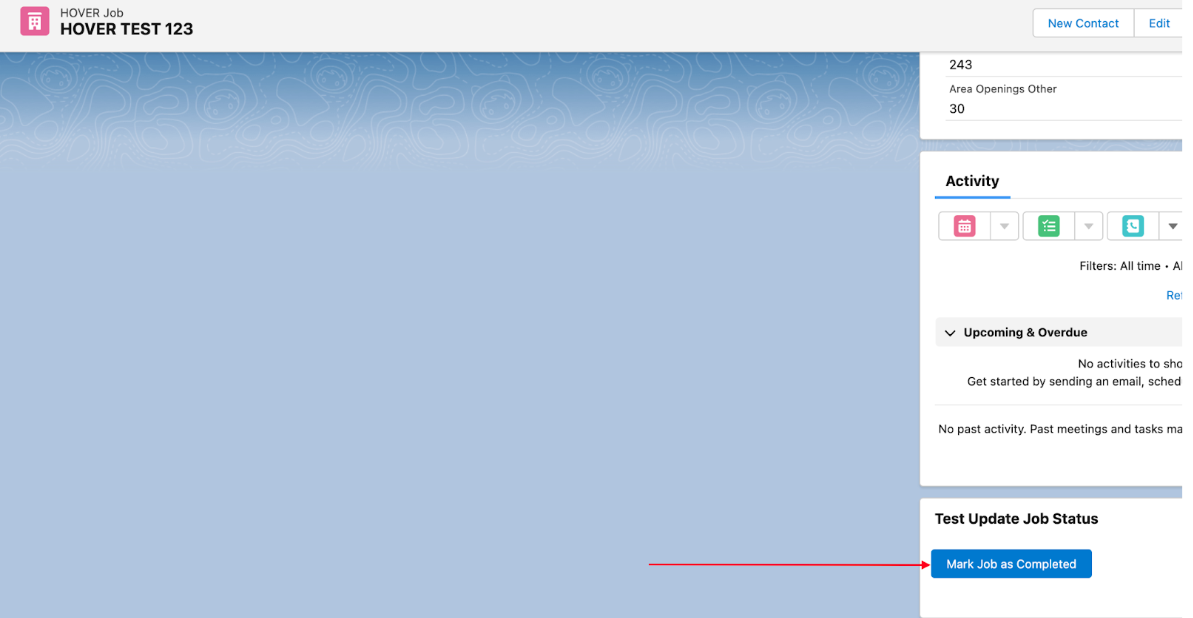
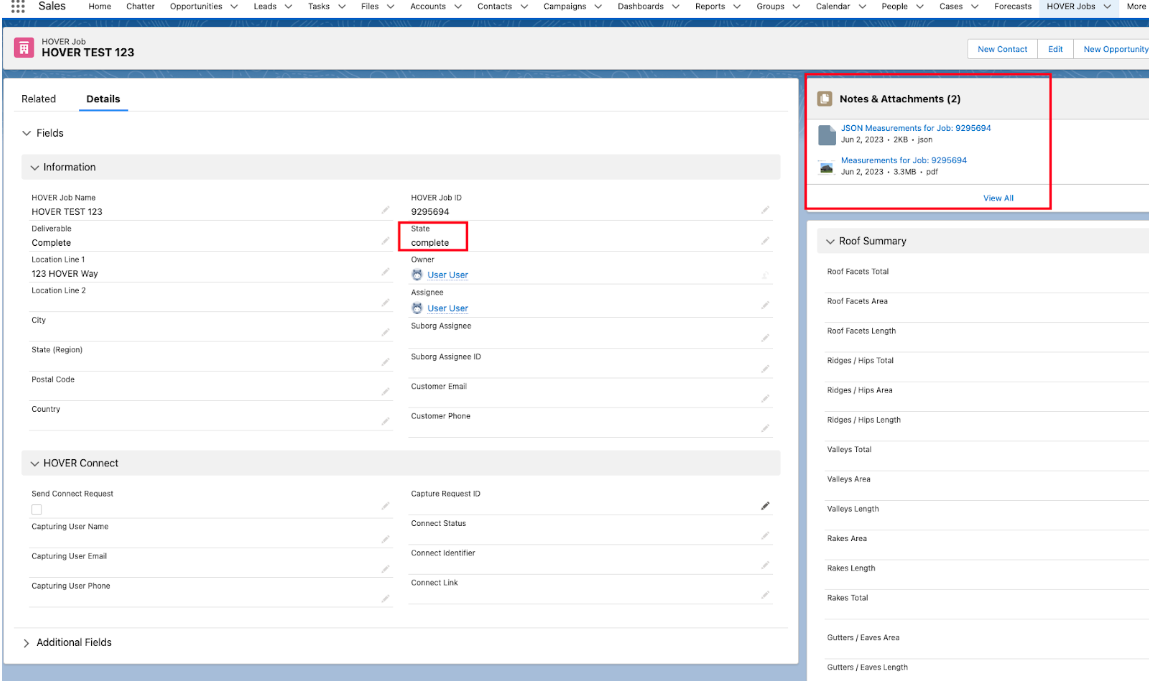
You can refresh the page and notice that the “state” field may change – this is completely normal and should end up in a complete state after 30-60 seconds.
Once the job has been completed, the integration will fetch a JSON file of the measurements and a PDF file of the measurements. These will be present on the object’s Notes & Attachments field:
Updated about 1 month ago